
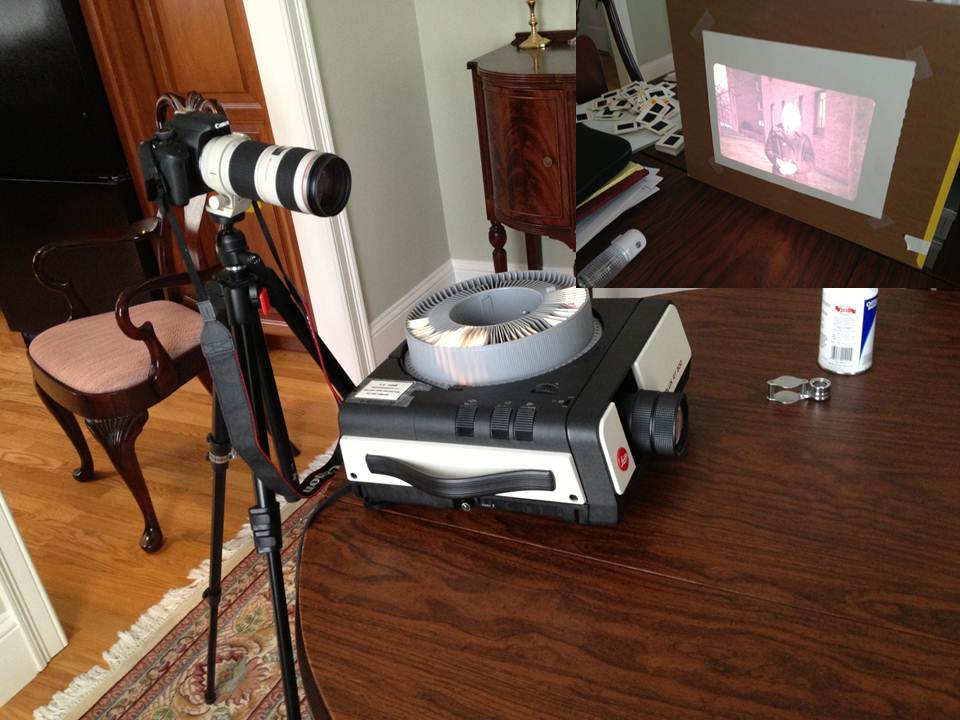
Figure 1 – Using a slide projector to digitize slides. Insert top right shows slide projected on screen. Method proved to be unsatisfactory because of the projector’s lens quality. (c) DE Wolf 2013.
I am a little perplexed, but I was doing some housekeeping on Hati and Skoll and discovered this blog that was meant to post on May 5 of last year, never did. The world went on. However, it covers what I think is a relatively important technical topic; so I thought that I would correct the error and post it today.
Recently, I decided to digitize my fairly voluminous collection of 35 mm slides. This is not a trivial undertaking, but it does serve a couple of fun purposes. First, you get to revisit all those “Kodak moments,” and second all the manipulations and subtle modifications that you wanted to do but couldn’t are no at your fingertips.
Actually, this last point is interesting. In the glory days of film, you had three choices: take slides, where once you mastered the medium, what you took was what you got; take color prints, where what you got was invariably washed out by the commercial lab’s print machine’s compulsion to set overall intensity to neutral gray; do your own color work, which was a truly daunting task, because of the level of temperature control required. This is not to mention expense. This all sounds like whining, but is pretty much true.
So, I went to the closet and unearthed the hundred of slides that I have squirreled away there and sorted them out into three not so neat piles: rejects, maybes, and definites. So far so good. Now I had to figure out out how to digitize them. 1. flatbed scanner? – don’t even think about it. 2. Have a service do it for you? – I’ve had bad experiences with this, but obviously it’s going to depend on the service and their equipment. 3. – get a slide copier? – I’ve not been happy with the sharpness this provides, but others have had success. 4. Get a slide copying attachment that screws into the from of a camera lens? – I’ve read such bad reviews of this approach that I decide that even at ~$40 it wasn’t worth the effort. 5. Put the slides in a slide trade. Put the slide tray in a projector. Project the slides on a sheet of paper, and take digital images. 6. Put the slides one by one on a viewing box and copy them with some kind of closeup lens system.
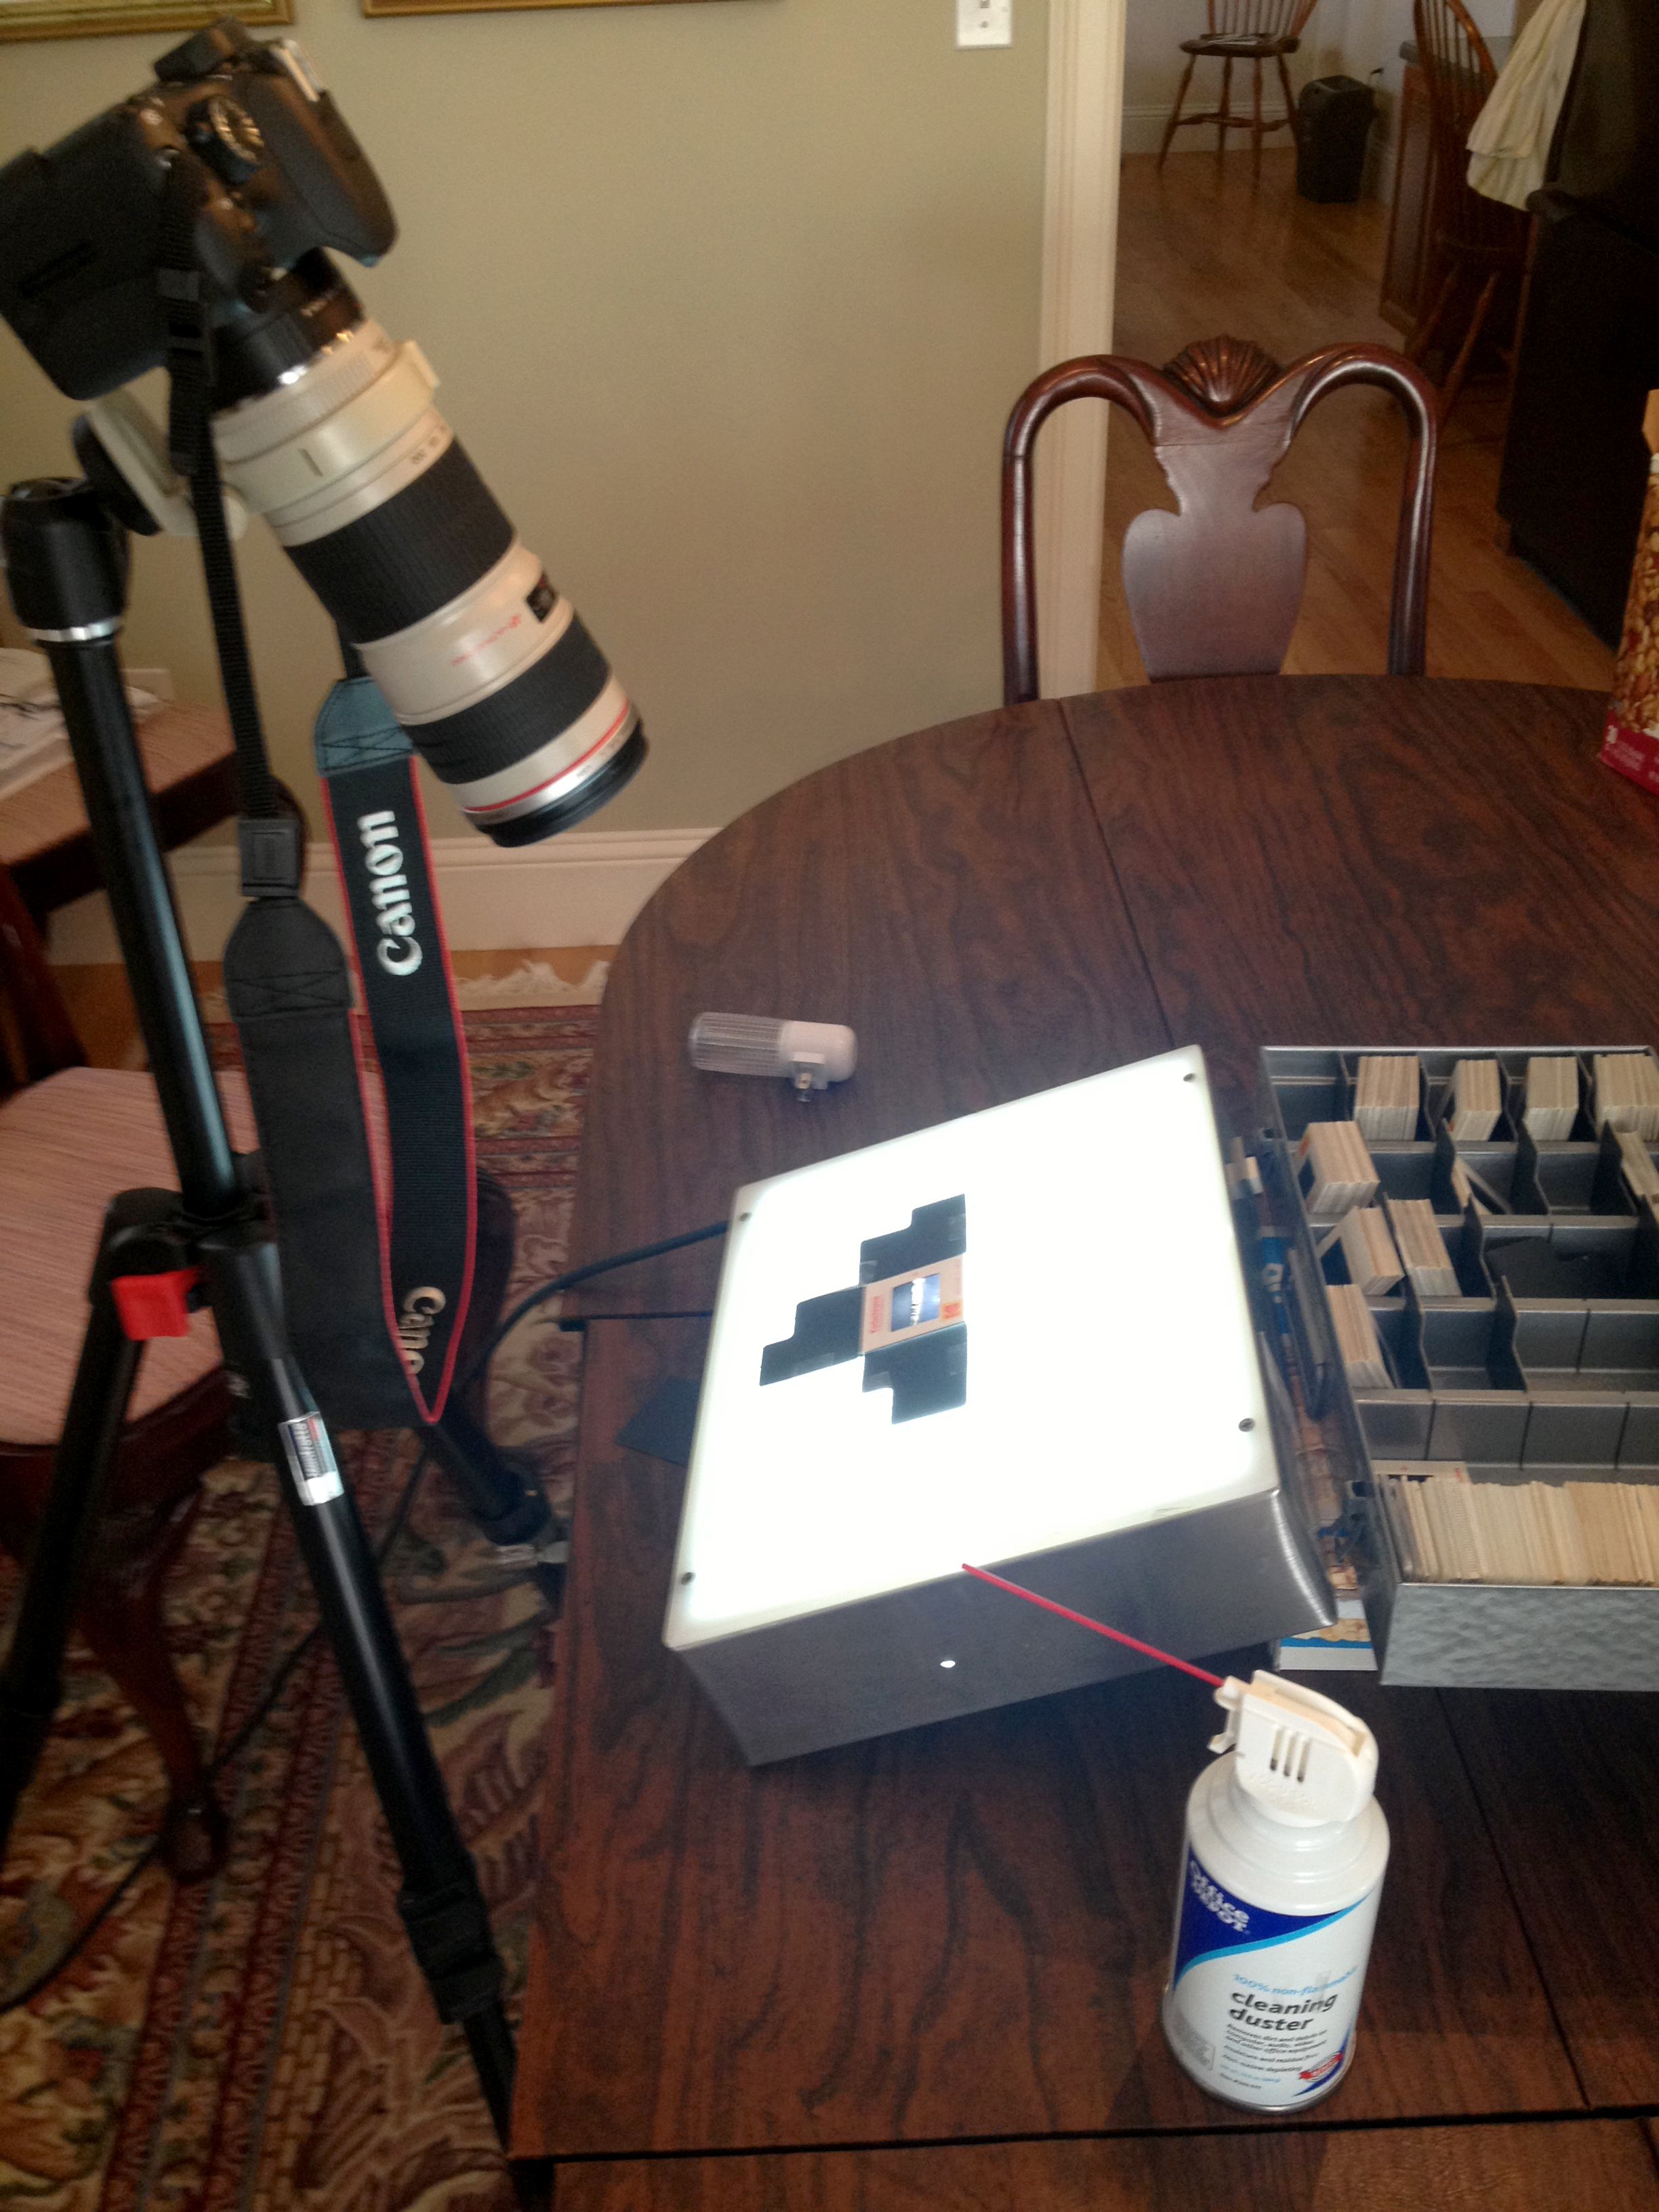
Figure 2 – Using a close-up lens and opalescent light box to digitize slides. (c) DE Wolf 2013.
The first method that I tried is number 5, and I have an picture of my setup in Figure 1. Basically, you’ve got a slide projector, which tips the image slight vertically and then the camera behind the projector with a compensating tilt. This would be so great and convenient, if it worked. The problem is that the projector lens is the rate limiting factor. I chose a Leica Slide Projector in the hopes that the lens would be up to the job. And bottom line there is nothing that I hate more than a fuzzy picture. REJECT!
So then I setup the system shown in Figure 2, which is method 6 above. Since it works well let me explain it in detail.
- Slide is copiously clean with compressed air.
- Slide is placed emulsion side up (that’s the duller side) on an opalescence (untextured) light box. Again the box is tilted and the camera has a compensating tilt so that it is perpendicular to the light box. You can also obviously use a copying stand, or use a piece of opalescent plastic taped to a window. Note the black paper jig that I built to mask out excess light and hold the slide in place. This way you will get the exposure right and also there will be no glare in the image. It is important to position the slide so bottom is bottom and top is top, that is so that the subject looks right.
- I am using a zoom lens at 100 mm focal length, with manual focus, and there is a closeup extension tube on the camera body. I had some interesting problems with this. First, my Tamron zoom lens was not up to the job of getting a crisp image. It never is. I then tried my Canon EFS 18-55 mm zoom and found that it would not work with my extension tube. the electrical connection wouldn’t work. I then resorted to my Canon L Series 70 to 200 mm zoom. This worked beautifully, with the one exception that the ideal is to totally fill the field of view with the image. I had to settle for only half filling the field of view. However, my Canon T2i offered enough pixels that this was not a serious drawback (as you will see). I set the f-number to 7.0, because as we have shown previously this is approximately where maximum sharpness is achieved on a flat subject. I shot at 100 ISO and adjusted the exposure compensation according to the detail on each slide. (Yes, this is a lot of work. But it is worth the effort). I always take raw image format. FOCUS VERY CAREFULLY!
- Next take the picture, making sure that things look right in terms of the focus and the dynamic range.
- Convert the image to a TIF file.
- Next in your image processor you NEED TO FLIP THE IMAGE HORIZONTALLY. That is you need to make a mirror image.
- Then crop the picture to get rid of any images of cardboard.
- Then adjust the levels to set a reasonable white, black, and gamma.
- You are now ready to make any additional adjustments. One important point is sharpening. I tend to use Smart Sharpen for Lens Blur in Adobe Photoshop. I usually sharpen between 4.0 and 8.0 pixels (depending upon the subject) with an average of about 6.0. If you need to sharpen more, you’ve got a lens or focusing problem.
As an example, Figure 3 shows and image that I took of the San Francisco skyline from the Sausilto Ferry in 1975.
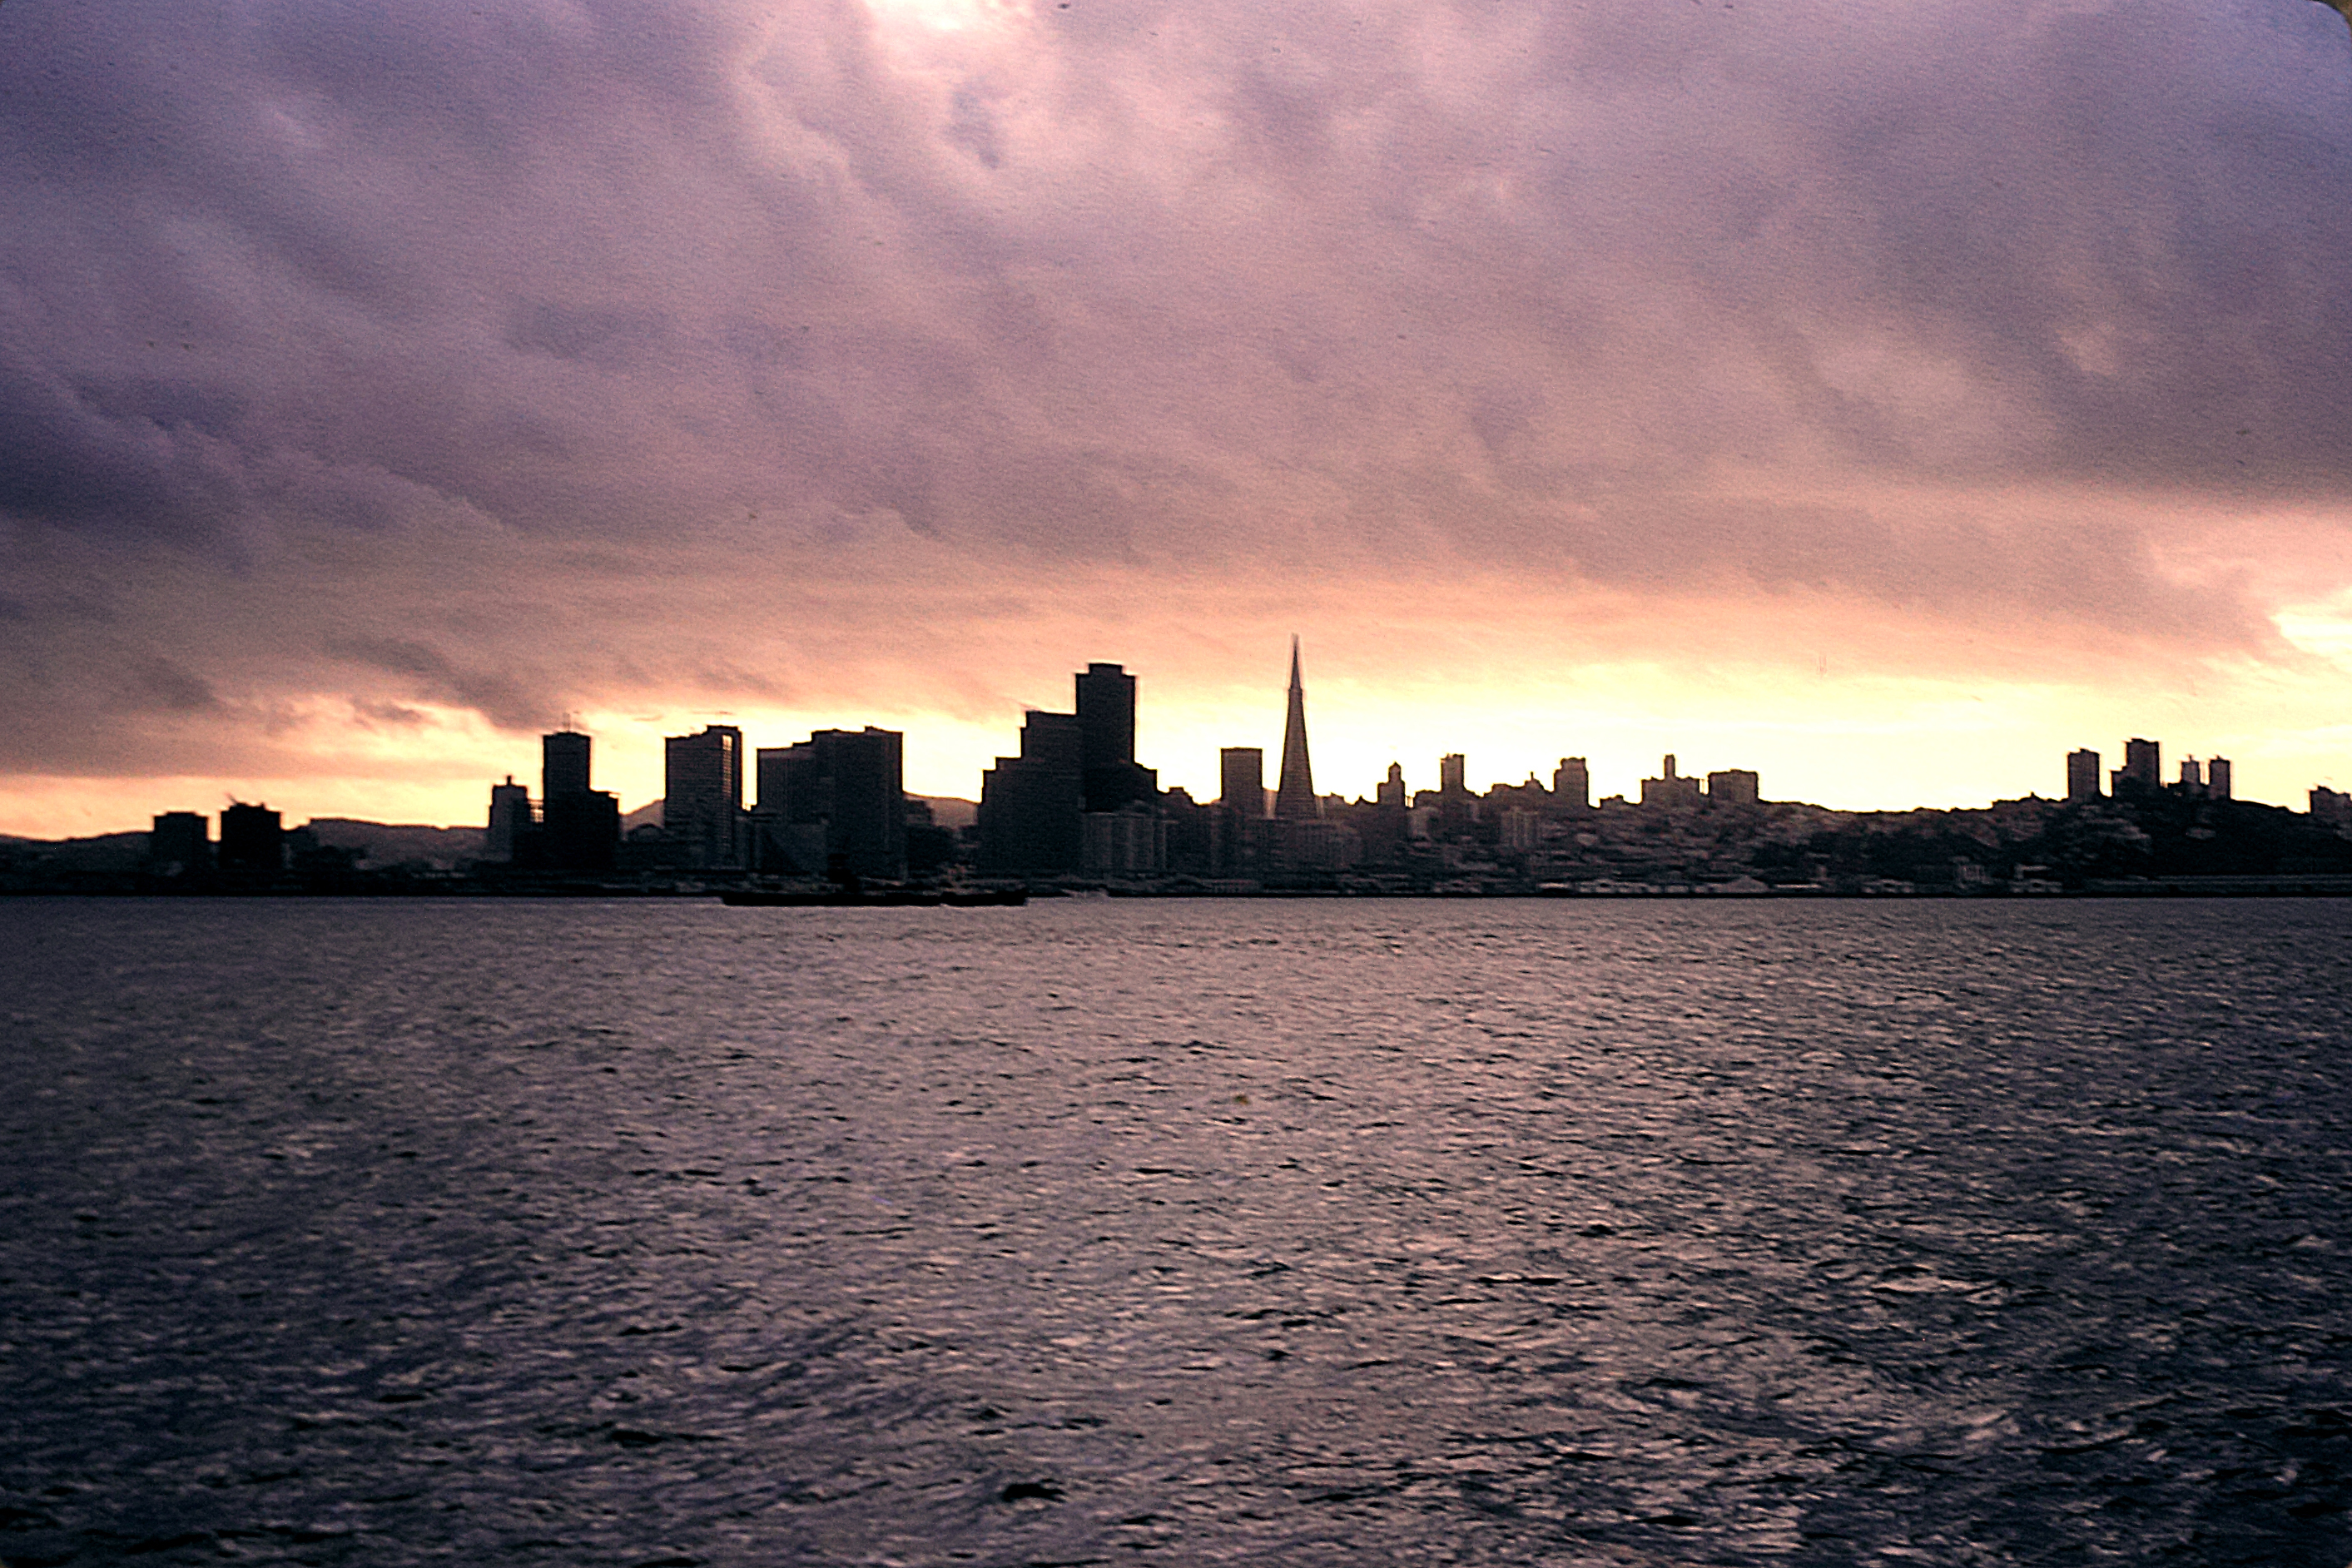
Figure 3 – “San Francisco from the Sausilito Ferry, 1975,” Digitized 35 mm Kodachrome Transparency.” (c) DE Wolf 2013.