
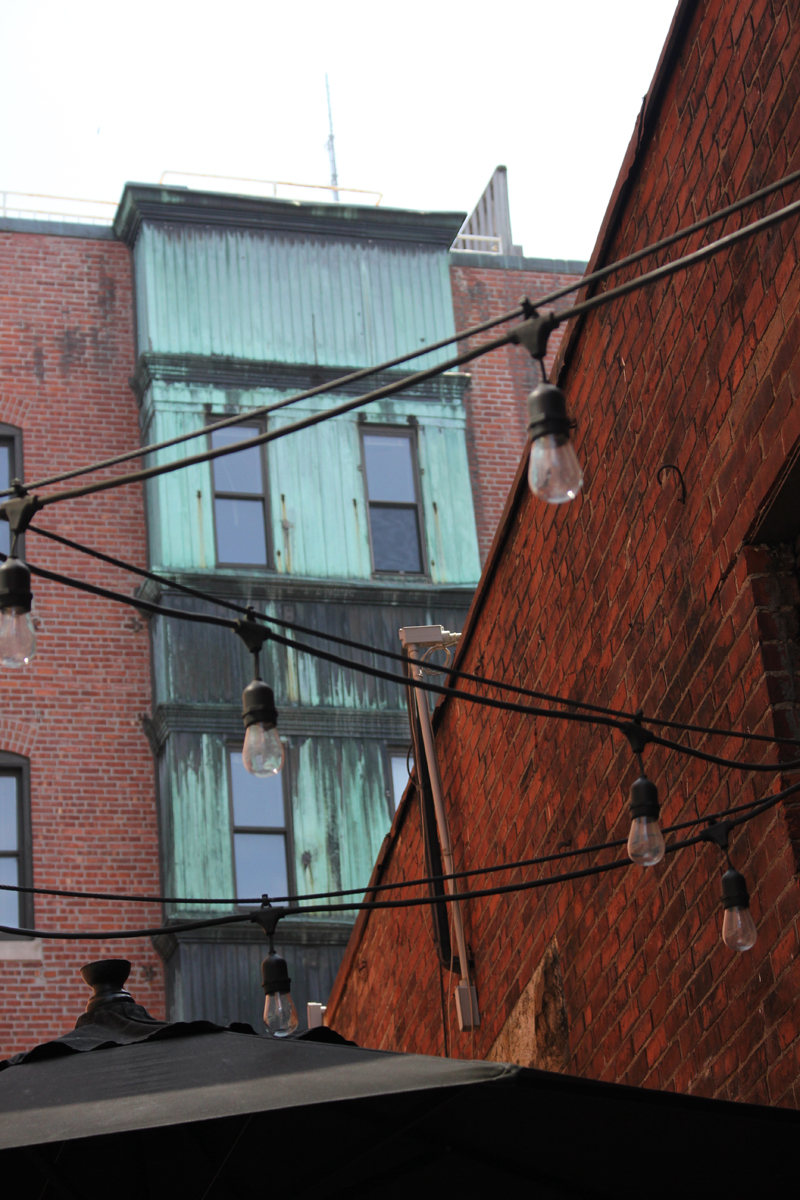
Figure 1 – Starting raw image. (c) DE Wolf 2013.
My wife and I went to Russell House Tavern on Harvard Square in Cambridge, MA for Sunday brunch recently. The day was gorgeous, and we were seated outside in the courtyard. Sometimes photographs are right in front of you, and such was the case on that Sunday. I happened to look up at the courtyard, the shade umbrellas, the electrical lines and lamps, and most dramatically the verdigris facade on the building across the street. I pulled out my camera, composed, and took a few images. The raw result is shown as Figure 1.
This has the usual dullness of the raw camera image. But there are bigger problems. Most problematic is the sky. It needs to be blue not white. And then there’s the troublesome backwards tilt to the picture. While I’m hardly the world genius expert on this, I thought that it might be interesting to describe how you can fix these problems. I
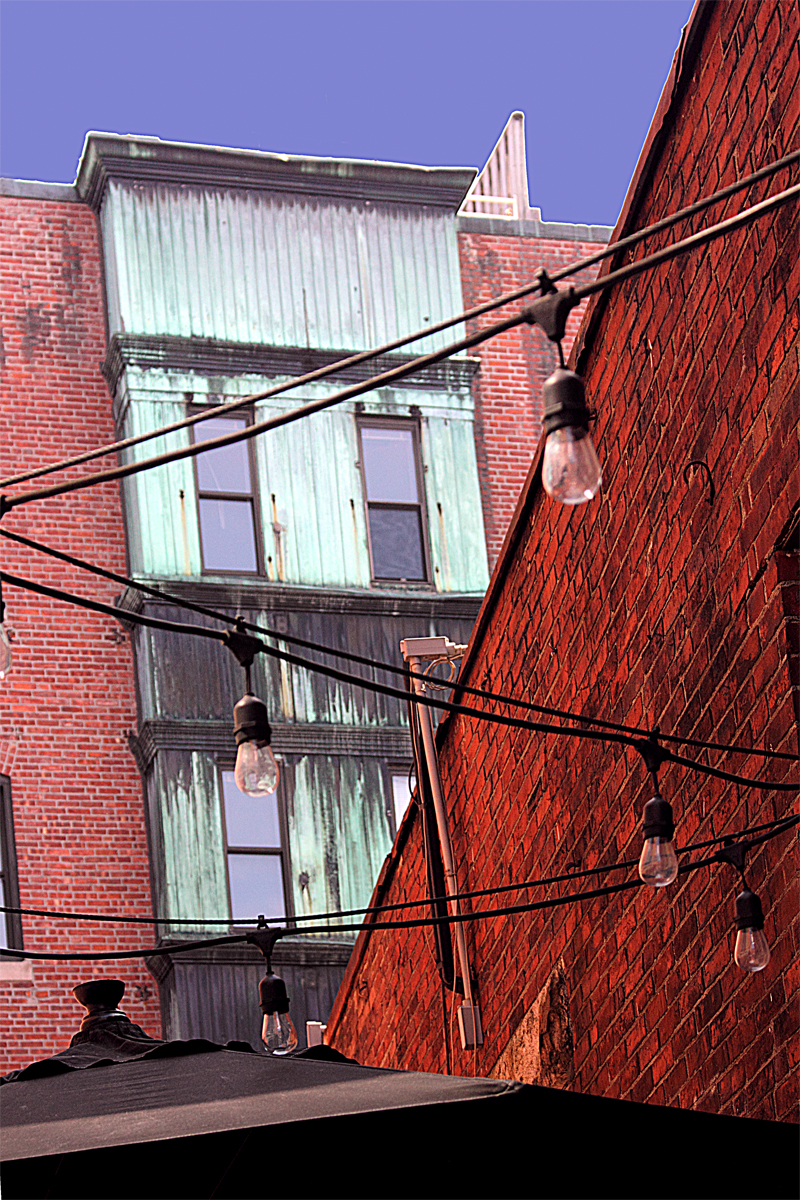
Figure 2 – The effect of using magic wand and paint bucket to make the sky blue. (c) DE Wolf 2013.
use Adobe PhotoShop, but other software can be similarly applied. The first thing that I tried was to click on the sky with the magic wand tool, to then pick the desired sky color, and then to apply it with the paint bucket. Then I brushed out the annoying fencing on the buildings roof, and did the usual set of sharpening and color adjustment.
Figure 2 shows the result. Yikes! You will note the very annoying white edge, where roof line meets sky. I tried variously to paint brush this away and kept winding up with an even uglier mess.
The solution to this problem, or the best that I have found, is to feather the edges of the sky. This is a lot like the old days in the darkroom when you wanted to dodge an area. You would create, a mask hold it over the the region to be dodged, and wiggle it furiously during exposure. Alternatively you can think of blurring the ink with a feather. In PhotoShop you will find that when you apply the magic wand tool there is an option in the tool bar to “refine” the edge, that gives you further options of “roundness” and “feather”. You’ve got to play with these to get the “best” effect for a particular image, which is easily done using the tool history.
With the present image, I also found that it was best to make all the color and sharpness adjustments before adding the sky. As for the tilt of the building, this tool is found under “filter,” choose “distort,” and then choose “rotate vertically.” With this image I couldn’t fix the perspective perfectly because I didn’t want to lose some of the compositional elements from the rectangular image frame.
The final result is shown in Figure 3. It’s not perfect. But the white edge is significantly reduced and I’m pleased with the results.

Figure 3 – Courtyard of the Russell House Tavern, Cambridge, MA (c) DE Wolf 2013
Lovely pic!
The verdigris unfortunately got whitened out against red. in color mixing the red and green contrast each other and your idea quite worked, however, the original picture has a lovely green, please retain or emphasize it. The foreground is overwhelming with red but personally I would darken it so that the eyes focus on to the verdigris. The purple windows are excellent!
instead of feathering why not grade the sky blue to white? Will that work?
I agree with you Rajn. I’ll see if I can adjust it further. After all the verdigris was ultimately why I took the original. Thanks for the feedback.